It's done! My craft room is finally done! Almost a year ago (for Mother's Day) Bryan told me the home office could become my craft room. He no longer needed a home office since he has his business office now. With the boys being so curious, crafting in the dining room wasn't working. Leave anything out for a bit and they were getting into it. So now a year later, the room is done! As you can see from previous posts, this has been a long time in the making. I moved things around several times, we got new furniture, I purchased cabinets and drawers to put it all away, and the last step was to paint!
Here is the finished product!!!
SCHOOL AREA

This is what you see when you stand in doorway. The left side of the wall is the school area. Bryan and I are calling the office the SCOR, school-craft-office-room. I am homeschooling Christopher next year so I wanted a space to work for him that is away from the distractions of the other boys. Cameron also has a desk for future schooling. He can work on some preschool type activities while Chris does his school work.

Chris's desk is on the left and Cameron's desk is on the right.
CRAFT AREA

View from the doorway looking at the right side of the room, my crafting space!

Lots of cabinet space for supplies - stamps, adhesives, embellishments (eyelets, brads, tools), etc. The clear boxes at the bottom are for pages that are being worked on for the boys' scrapbooks. Hoping to get scrapping very soon and get closer to being caught up on their albums.

This cute buckets are from my wedding! They were the centerpieces on the tables in the reception. Now they are repurposed for craft supplies. These have chipboard, stickers, and rub ons. More are in the cabinet underneath that hold small letter stickers, various scissors, and more.

This is my main workspace.
From top to bottom:
top shelf - paint & CM cutting system
long shelf - various sizes of ribbon (the boxes are FULL!!!)
hanging rods - flowers, buttons, pens, tools
underneath - Cricut machine & drawers for bow stuff, cards, and ongoing projects

This is more workspace!

More storage on the walls!
The tall cabinets hold scrapbooks that are in progress, idea binders and tear files, more paper pads and scraps, Cricut mats, 8 1/2 x 11 paper, and TONS of alphabet stickers.
Notice all the pictures I need to scrap on the left. They are FULL of pics from Jan of 2008 - February 2009! I need to get busy.

Close up of the wall storage over the work area.
Small trash can for little pieces of trash and a bin for little scraps.

Lots of stickers - now I can actually SEE what I have!
Please leave a comment and let me know what you think!!!
Thanks to my wonderful husband for 1) giving me the space to be creative (and relax!!!), 2) for painting the room for me on Monday and Tuesday nights after working ALL day, and 3) for putting up all the shelves and rods all afternoon today.
Bryan, I love you so very much. You are always willing to go above and beyond to make me happy. Thank you so much for loving me!
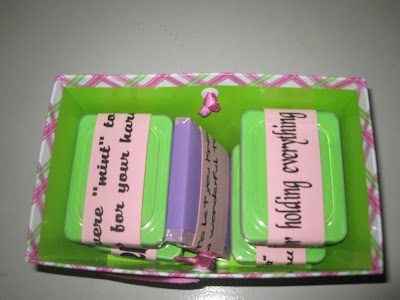
 I saw this idea here and made it my own using all the baby food containers I have been saving! I didn't use all the sayings but I did fill the containers with paper clips, mints, change (for a soda), a post-it notepad, and cute magnets from the dollar bin at Michaels. To bundle them all together I put them in baskets I found in the Dollar Spot at Target.


